IKEA Hack Platform Bed – Freestanding Version
With 22 million views as of this writing, my IKEA Hack Platform Bed is, by far, the most successful video on my channel. It has inspired hundreds of people around the world to build a bed from ordinary kitchen cabinets. And it has inspired me to continue publishing videos of everything I do around the house.
IKEA Hack Platform Bed
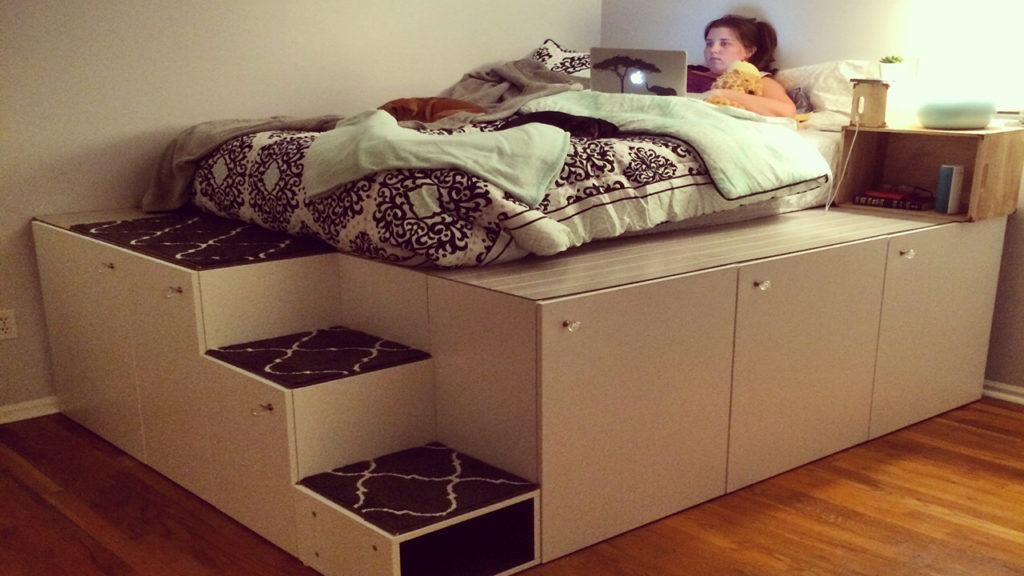 Although the bed has more than 200,000 likes, there are some people who don't like the original design for two reasons:
-
- It's attached to the walls and many people they can't (or won't) permanently attach a bed to their walls
- It takes up a lot of floor space and some people have rooms too small for such a large footprint
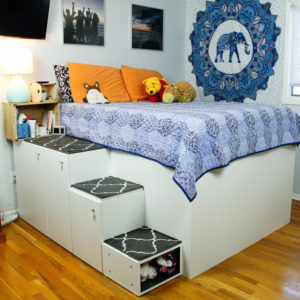
Alternative Design
If you relate to either of those reasons, you may like this alternative design, which I call the IKEA Hack Platform Bed – Freestanding Version… because, you know, it's freestanding.
That's right, it's not attached to the wall at all. If you have hardwood floors, like I do, you'll be able to slide this bed anywhere around the room. Just like a normal bed.
Disassembly*
(*THIS is why I use screws!)
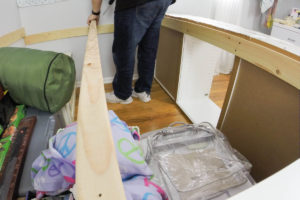
I started by dismantling the existing bed framing. And removed all the stuff from storage area. I reused all of the components from the original design. Even the screws.
I turned the long bank of cabinets and positioned them far enough from the wall so the doors would open fully. Then I placed the opposite side using the measurements of the mattress.
Frames to Support the Structure
To make the bed freestanding, I needed to make two frames to act like mini walls to support the rails. I used 1 x 3 pine here, which is plenty strong enough and maximizes the usable space.
These frames have three “studs” sandwiched between a top and bottom plate. I cut some 45-degree angled supports from scrap 3/4-inch plywood and used them to stiffen the frames and attach the melamine sheets.
Melamine is a white chemical resin that feels like hard plastic.
 Melamine sheets are 3/4-inch thick dense particle board sandwiched between two layers of that white plastic. It's very heavy and durable, and it matched my IKEA cabinets perfectly.
I used edge banding made from the same material with glue on the back. I attached it to the cut edges with an iron (I used a hobby iron, but you can use a regular laundry iron as well). The edge banding is a little wider than the board, so I just trimmed the excess with a small block plane for a nice clean look.
I used the melamine to close in the foot of the bed, but you can obviously use additional cabinets here if you want.
I attached the melamine to the cabinet after drilling pilot holes, using tape as a depth gauge so I didn't drill too far. Then I secured the frame to the melamine by screwing through the angle braces.
Rails and Slats
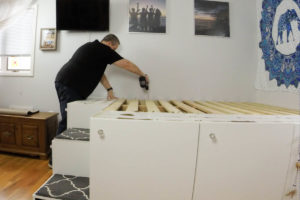
Three rails run from the head to the foot of the bed on top of the two frames. The side rails are attached to the cabinets on both sides, and the center rail is attached to the frames.
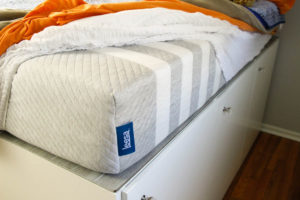
Then I screwed twelve 1×4 slats to each of the rails. I used two spacer blocks cut from scrap wood to space the slats 3″ apart. You generally don't want slats spaced further than 3″ to support a mattress, especially a foam mattress like the Leesa.
I reattached the gray paneling with a couple of screws. The carpet tape from the original bed was still very sticky (as you can tell by the cracked panel) so I didn't bother replacing it.
Sponsored by Leesa
This video was sponsored by Leesa, who also provided me with a mattress and a small commission if you purchase a product using my link. They make your mattress to order and ship it for free. Then you get a 100-night risk-free guarantee, which includes free return shipping, so you really have nothing to lose!
The best part is YOU can save $75.00 off the price of a Leesa mattress using my link! Just click the button to shop now:
Blueprints Available
Blueprints for this project are available for purchase in my store. The detailed blueprints show you exactly how I built this bed so you can build an exact replica or adapt it to your own design.
Celebrating 30 million views! Use coupon code 30MILLION for 30% off bed blueprints!



How much did everything cost without mattress just hardware and cabinets? I love idea I’m try to do something just like this without taking up to much room
See the Q&A Page for the supplies and costs.
Going to attempt this project soon! Do you know how much weight the freestanding and mounted platform beds can withstand? Our weight together is around 320 lbs.
Never scientifically tested it, but we’ve had 3 adults on the bed, including me, and I’m a big boy.
Can you tell.? What material you used to made Ikea bed.
All the materials are listed on the Q&A page of the original bed. The only thing I added for the freestanding version was a sheet of melamine.
What would the dimensions for this version of the bed be?
Hi Ashley. The freestanding bed is the same length as the mattress, but 15 inches wider. I used a full-size mattress, which is 53″ x 75″, so the overall size of my freestanding bed is 68″ x 75″.
hi thanks for the wonderful idea, im planning on using this in my apartment, as i recently broke up with my fiancee of 3 yrs and im looking at switcing things around, just wondering but the storage area did u keep it but just amongst the cabinets on the right side of the bed??
Yes, I kept the storage area under the bed, but it’s a bit smaller since I pushed the cabinets under the mattress.
Hi there I have a quick question! I love the free standing bed frame as it would work best for my husband and I. I was wondering if it was possible to put stairs on either side of the bed and then add cabinets at the bottom? That way neither myself nor my husband are crawling over each other to go to the washroom or get up for work… also have you designed a headboard for the bed from ikea hacks?
Looking at making a permanent bed that’s easy to break down when moving and accommodates a lot of storage!
Hi Rebekah,
I would love to build a version like you describe using our king mattress in the master bedroom, but the Mrs. won’t go for it. 🙁
I’ve definitely thought about the design having steps on both sides so nobody needs to climb over anyone. As long as you’re willing to have the head of the bed against the wall, it’s definitely possible to do. As for the headboard, with a big bed like that, I’d probably opt for a feature wall behind the bed (see https://youtu.be/TLNTOQBVpzU for an idea).
Chris
I like this version only I would want the cabinets at the end of the bed, so we could still butt it up to the wall like the original, do you have a blueprint for that….. so you have the steps on the long side, cabinets at the foot and the head and other long side is free syanding?
I only made blueprints for the two versions that I made. But you could definitely follow the method of building a long artificial wall, as done in the freestanding version, but under the long side of the bed instead of screwing it to the wall.