Build a Curved Pergola for $800
This curved pergola is the highlight of our back yard. It is a beautiful structure that makes our patio feel like an outdoor room from Spring through Fall. In the summer, I attach a shade tarp on top of the pergola to block 95% of the sunlight. The patio would be unusable during the day without it.
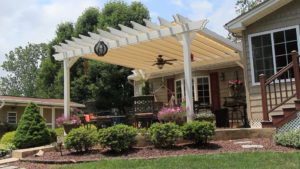 Building a pergola isn't hard, but it takes planning and muscle. Don't trivialize the planning; I planned this for months before I pulled the trigger. Now I would design a pergola with SketchUp but wayyy back in the olden days of 2007, I just used graph paper and a ruler. I like to know, in advance, exactly what I need to buy, how it will be cut, and where every nail, screw or bolt will go.
Don't trivialize the muscle, either. You'll need six strong friends (including you) to put it up. You'll build each post-and-beam assembly on the ground and then stand them upright. Then, four people will be holding posts while you and another person put up the four outer rafters. You'll need two tall step-ladders as well.
Blueprints Available with bonus Curve Calculator
Blueprints for this project are available for purchase in my store. The detailed blueprints show you exactly how I built this pergola so you can build an exact replica or adapt it to your own design. It also includes the Curve Calculator spreadsheet for free.
Parts of a Pergola
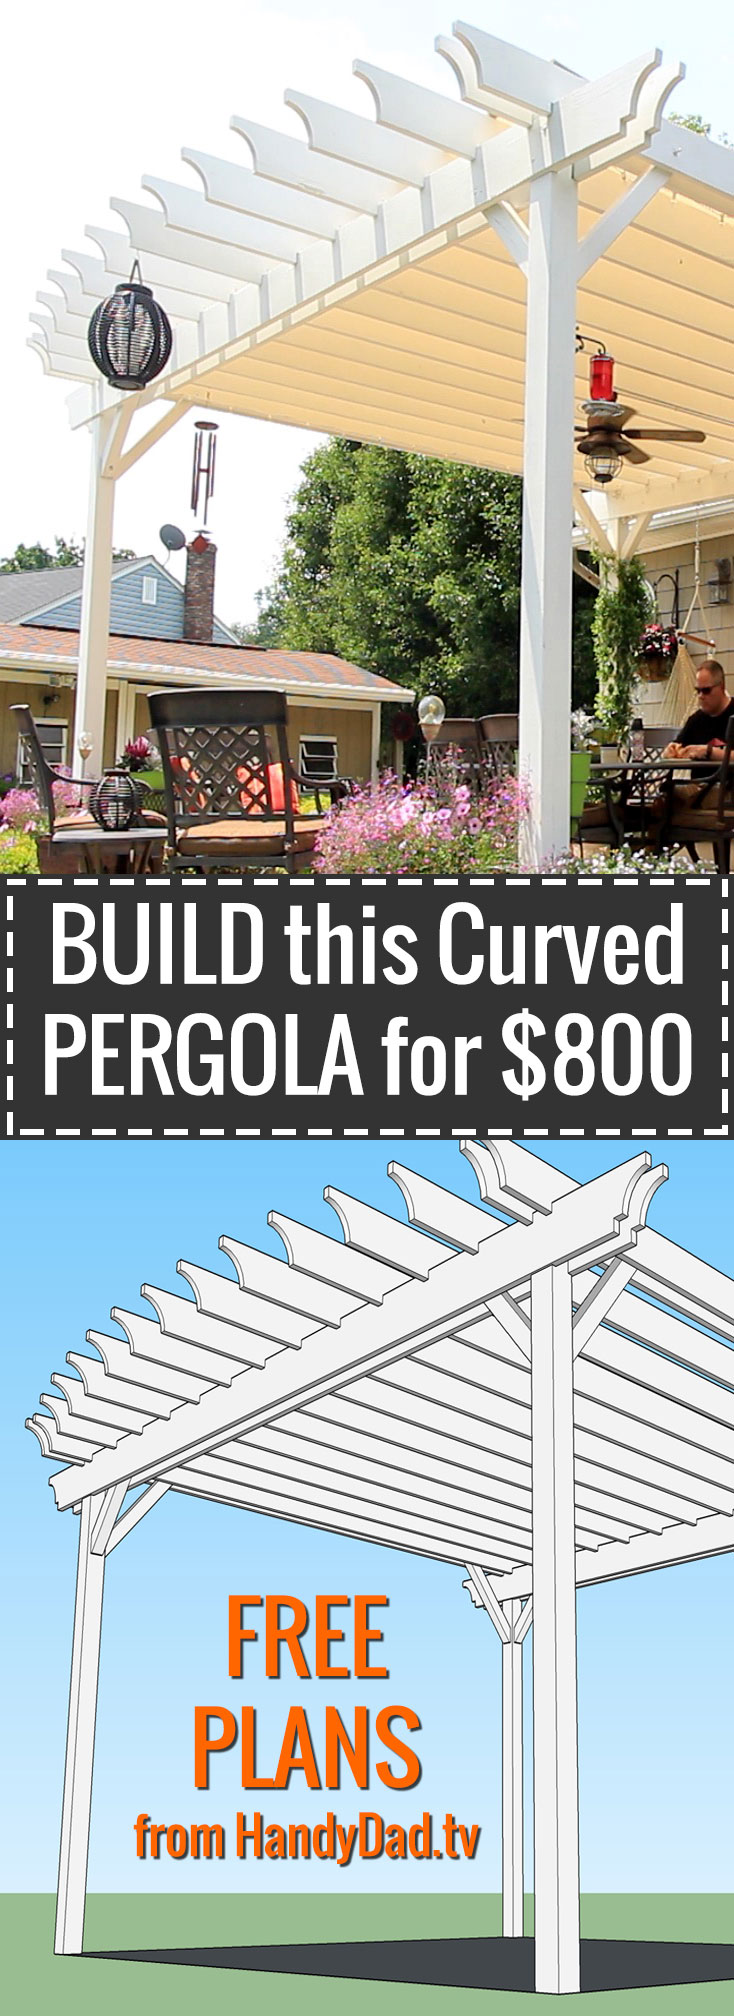
- Posts – These are the four vertical pieces that support the entire structure. They are the only pieces that come in contact with the ground. I used 6x6x10′ pressure treated lumber and I eased the corners with a 3/8″ roundover bit in my router. I've seen smaller pergolas with 4×4 posts but I prefer the larger ones.
- Beams – These are the four heavy framing members that go from left-to-right over the posts. These are 2x10x20′ pressure treated boards.
- Rafters – These are the 15 top boards that go from back-to-front and are notched to fit over the beams. These are 2x8x20′ pressure treated boards. My design has curved front so they are different lengths, but you can simplify the project to make them all the same length if you want.
- Cross Braces – These 4×4 boards are critical to the design. Without them, the structure would never withstand hurricane-force winds.
Don't make the mistake I made: always use pressure treated lumber outdoors, even for parts that don't come in contact with the ground. I originally built this pergola with douglas fir beams and rafters but it rotted after 7 years and needed to be replaced. It's not easy (or cheap) to get 20-foot pressure treated lumber – it needs to be special-ordered and delivered by a lumber yard or home center. Also, it's structural lumber so it has a lot of imperfections if you look closely. I'd prefer to hand-pick my own boards but that's just not practical with this size.
Home centers usually have 16-foot lumber that you can hand-pick, but that wasn't big enough for my design.
Shade
I'm good at making mistakes. But thankfully, I try to learn from them. Even with all my obsessive planning, I still overlook things. Like all that rotted lumber. That was a painful mistake.
Well, here's another mistake. I initially built the pergola thinking the rafters alone would provide some shade. I couldn't have been more wrong! My pergola faces directly at the sun during the hottest part of a Summer day so we desperately needed a “Plan B”. And quick.
The solution: I covered it with sheets of vinyl white lattice from my home center. 8 sheets made a 16 x 16 square. It was okay (just okay) but I don't recommend it. The lattice looked cheap, it got dirty, and it warped from the heat.
When I replaced all the beams and rafters in 2014, we decided to try a sun shade mesh tarp. I found a good online source that had 16 x 16 tarps in black or green for around $150. I went with green. It gave good shade and was a much better solution than the lattice, but we didn't like the dark tarp on a white pergola.
As fate would have it, I accidentally threw the green tarp away in 2015 while cleaning out the shed (I mistook it was a leaf net used on the pool cover) so we decided to use this opportunity to get the tan shade tarp that we really wanted. Unfortunately, I couldn't find that fabric in 16 x 16 so it had to be custom made and cost around $270. Not cheap, but worth every penny.
Like I said, I'm good at making mistakes. But this the tan tarp is exactly what we needed and we now have the perfect pergola!
Cost of the Curved Pergola
I spent about $500 to build the initial version of this pergola in 2007 and another $600 in 2014 when I had to replace all the beams and rafters with pressure treated boards (which are understandably more expensive). If I built it today, and did it right the first time, it would probably cost around $800.
That's $800 just for the structure and doesn't include the paint, fan, lights, etc.
Footings
I didn't spend any time in the video talking about what's under the pergola so I'll mention it here. My pergola weighs about as much as a Toyota Camry so it needs to be properly supported. I've got a very thick patio, so I wasn't concerned. You need to plan for your pergola to be sitting on something rock solid before you start building. This is especially important if you're building it on a deck. A deck will not support the weight of a pergola, so the posts will need to go through the decking to footings in the ground. I mean real concrete footings; don't just build this on four patio blocks because they will disintegrate under the weight.
Paint
My pergola is painted with a white exterior stain. It is applied with a brush and roller just like paint so I'm not sure what makes it a “stain”. Pressure treated lumber is very wet and shouldn't be painted right away or it could peel. To prevent this, let the wood dry for at least a month before coating it. I gave my pergola at least three months to dry; I built it in late Spring and painted it in the Fall.
I know what you're thinking: it would be a lot easier to paint the parts before assembly. I had that same idea in 2004. I thought I was so smart by giving it two coats on sawhorses after all the cutting was done. They looked great but unfortunately, all the boards got banged up during assembly and the paint scratched. So I needed to buy extra paint and give it a third coat it after it was done. I wasn't sure if painting too soon contributed to the rotting wood, so during the 2014 rebuilt, I decided to let the new wood dry for the summer and I gave it two coats of white stain in the fall. Lots of up and down on a step ladder.
If you enjoyed this project, please share the page!



you mentioned in the video you have an excel file to estimate the space for the rafters, would you be able to share it?
The curve calculator is provided with the blueprints.
Does the shade tarp keep out any rain?
No, mine just provides shade.
Hello! What type of hooks (or other item) do you use to secure the tarp to the top of the pergola. Thanks!
I get this question a lot and should really do a separate video about the tarp. I didn’t use hooks. I just used exterior screws through the grommets but left them sticking up about a 1/4″. The tarp is stretched tight, but not too tight that I can’t remove it. I just lift and pull it over the screws to remove it; I leave the screws in place.